
The difference between a 92% survival rate and an 84% survival rate across 200 head means roughly 16 extra animals reaching market weight. At current prices, that's somewhere between $12,000 and $20,000 depending on your species and local market. Most farms run their neonatal calf management based on whatever they remember from last season, scribbled notes on feed room walls, or verbal handoffs between shifts.
Livestock operations I've worked with—ranging from 50-head goat dairies to 800-head cow-calf setups—show a consistent pattern. Farms with structured neonatal protocols hit better survival rates, but more importantly, they catch problems at Day 3 instead of Day 14. The difference between treating mild scours and losing an animal to severe dehydration usually comes down to having clear escalation triggers that anyone on the farm can follow.
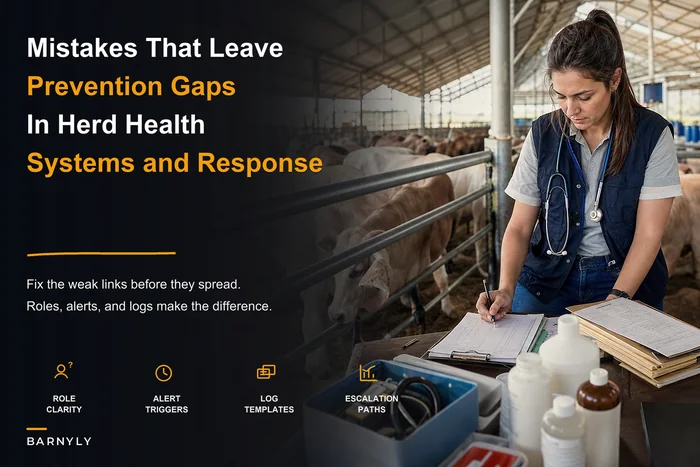
Why most neonatal protocols fail before Day 7
Your typical farm neonatal protocol looks something like this: make sure they nurse within 6 hours, check navels, watch for scours. That's not a protocol—that's a rough idea that falls apart the moment your experienced hand takes a sick day or you're managing multiple births during a storm.
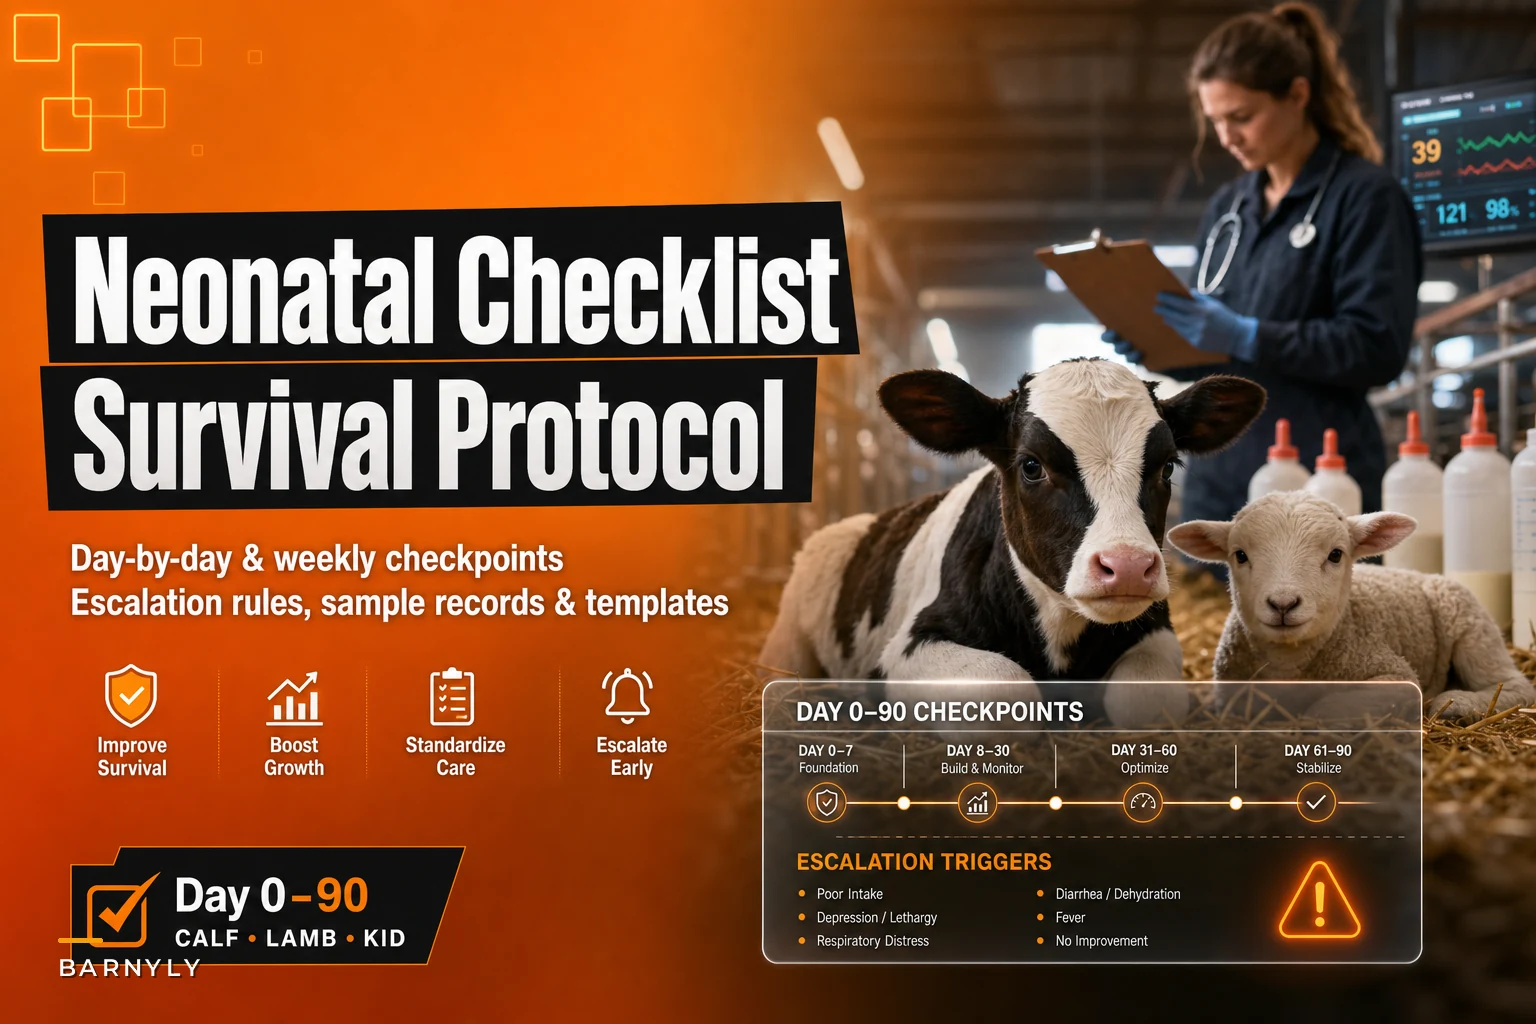
The breakdown happens because farms treat the first 90 days as one continuous period instead of distinct phases with different risk profiles. Day 0-7 requires completely different monitoring than Day 30-60. A two-day-old calf with slightly loose stool needs immediate attention. That same presentation at Day 45 might just need a diet adjustment.
Breaking those first 90 days into clear operational phases works. Each phase needs specific checkpoints, escalation triggers, and record requirements that any farm hand can execute. Not because you don't trust your team's judgment, but because standardized protocols remove the guesswork during those 2 AM barn checks when everyone's exhausted.
Day 0: The six-hour window that sets everything else
Birth to six hours old determines more outcomes than any other period. Miss colostrum intake in this window and you're already fighting uphill.
Simplify farm operations and enhance animal care.
Barnyly helps you organize, track, and manage every aspect of your farm operations seamlessly.
- Comprehensive livestock tracking
- Automated health alerts
- Feed and resource scheduling
No credit card required
Hour 0-1:
-
Record birth time, dam ID, birth weight if scale available
-
Check breathing (should normalize within 2 minutes)
-
Observe standing attempts (strong calves try within 15 minutes)
-
Navel dip with 7% iodine solution
-
Tag or temporary ID marker
Hour 1-4:
-
Monitor nursing attempts
-
Document if nursing observed
-
Check dam's udder for milk letdown
-
Environmental temp check if under 40°F or over 85°F
Hour 4-6:
-
Confirmed colostrum intake (nursing or bottle/tube)
-
Minimum 10% body weight in colostrum (4 liters for 40kg calf)
-
Second navel dip
-
Move to clean, dry environment if needed
Escalation trigger: No nursing observed by hour 4 = intervene with bottle or tube feeding. Don't wait for the "maybe they nursed when I wasn't looking" assumption.
Sample record entry: ID: 2024-B47 Birth: 3/15 04:30 Dam: 447 Weight: 38kg Nursing confirmed: 05:45 Colostrum: Natural, observed Navel: Dipped 04:45, 08:30 Temp at birth: 52°F Location: Pen 3
This first day determines so much of what follows. Animals that clear these checkpoints smoothly rarely become problem cases later.
Days 1-7: The daily rhythm that catches problems early
The first week needs twice-daily checks minimum. Not casual walk-throughs—structured observations with specific evaluation points.
Morning check (before 8 AM):
-
Attitude score (1-5 scale
5=bright/active, 1=depressed/down)
-
Appetite assessment (aggressive nurser, normal, slow, refused)
-
Fecal score (1=normal formed, 2=soft, 3=runny, 4=watery, 5=bloody)
-
Navel check (dry, slight moisture, discharge, swollen, hot)
-
Temperature if attitude ≤3 or fecal ≥3
Evening check (after 4 PM):
-
Repeat morning evaluation points
-
Weight tape measurement on Day 3 and Day 7
-
Environment check (bedding dry, drafts, crowding)
Escalation triggers:
-
Attitude score ≤2
Immediate vet consult
-
Fecal score ≥4
Begin rehydration protocol
-
Temperature >103.5°F or <100°F
Treatment protocol within 2 hours
-
No weight gain by Day 7
Nutrition review
Your fecal scoring needs to be consistent across all handlers. Train everyone using the same visual reference—print photos if needed. A "3" to one person might be a "4" to another, and that difference determines whether you start electrolytes immediately or wait until tomorrow's check.
Most health problems that kill neonates show up as subtle changes before they become crises. Daily structured checks catch these early warning signs when treatment still works effectively.
Day 8-30: Shifting from survival to growth monitoring
Once you clear that first week, the protocol changes. Daily checks can move to once daily, but you're tracking growth indicators more closely now.
Daily checkpoint:
-
Visual health assessment (eyes, nose, general alertness)
-
Feeding behavior (for milk/replacer fed animals)
-
Group dynamics (bullying, isolation, competition issues)
-
Fecal consistency check
Weekly measurements:
-
Weight or weight tape
-
Body condition scoring
-
Feed intake records (if measurable)
-
Any treatments given
New escalation triggers for this phase:
-
Weight gain <0.5 lb/day (calves) or <0.1 lb/day (kids/lambs)
-
Persistent loose stool for 3+ days even if mild
-
Coughing in more than 2 animals in same group
-
Feed refusal for any single feeding
Catch the slow-growth animals before they become chronic poor-doers. An animal gaining 0.3 pounds daily when their peers average 1.2 pounds won't look obviously sick, but they're already falling behind in ways that compound over months.
The transition from pure survival focus to growth optimization happens gradually through this period. Animals that struggled early often show compensatory growth if you catch nutritional or health issues quickly.
Day 31-60: Transition challenges and group dynamics
Month two brings weaning stress for some species, solid feed transitions, and increased social pressure in group housing. Your protocol needs to account for these management changes.
Three-day check cycle:
-
Group feeding behavior observation
-
Competition at feeders
-
Respiratory signs (coughing, nasal discharge, elevated breathing)
-
Skin/coat condition
-
Social positioning (leaders, followers, isolated animals)
Weekly protocols:
-
Weight checks continue
-
Vaccination schedule per your veterinary plan
-
Deworming protocol if indicated
-
Hoof checks for lambs/kids
Transition-specific escalation rules:
-
Any animal losing weight during weaning
Individual feeding protocol
-
Respiratory signs in >10% of group
Immediate group health assessment
-
Feed intake drop >20%
Review feed transition speed
This phase catches a lot of operations off guard because problems manifest differently. Instead of acute scours, you see gradual condition loss. Instead of obvious illness, you get subtle respiratory issues that explode into pneumonia two weeks later.
Group dynamics become more important now. Animals that were fine individually might struggle when dealing with competition for feed or water. Social stress compounds other health challenges in ways that aren't always obvious until animals start falling behind their peers.
Day 61-90: Final growth push and outcome predictions
The last month of your neonatal protocol focuses on ensuring animals are on track for their next production phase, whether that's continued growth, breeding preparation, or market readiness.
Weekly evaluation:
-
Weight and average daily gain calculation
-
Body condition score
-
Comparative growth ranking within cohort
-
Health treatment history review
-
Feed efficiency observation
Monthly comprehensive check:
-
Full physical examination
-
Vaccination status confirmation
-
Parasite monitoring (fecal egg counts if available)
-
Feet/hoof condition
-
Reproductive development (if applicable)
End-of-protocol triggers:
-
Bottom 20% by weight
Extended monitoring protocol
-
Animals requiring >2 treatments
Flagged for culling consideration
-
Top 20% performers
Tagged for replacement selection
By Day 90, you should have clear data on which animals thrived under standard protocols and which needed extra intervention. This drives future breeding decisions and helps identify systematic issues in your operation.
The record system that actually gets used
A protocol without records is just good intentions. But if your record system requires 20 minutes of data entry per animal per day, it won't survive the first busy kidding season.
The three-tier record system:
Tier 1 - Quick daily marks (30 seconds per animal):
-
Simple scoring card on clipboard at pen
-
Check boxes for normal/abnormal
-
Space for ID and notable observations
-
Weekly transfer to permanent records
Tier 2 - Intervention records (2 minutes per event):
-
Treatment given, dose, route, withdrawal time
-
Who administered, when, why
-
Response to treatment at 24 and 48 hours
-
Links to your medication tracking system
Tier 3 - Summary metrics (calculated weekly):
-
Average daily gains by cohort
-
Treatment rates by age group
-
Mortality and morbidity percentages
-
Cost per pound of gain
Paper systems work fine for daily checks if they're designed right. A simple grid with animal IDs down the left and dates across the top, using number codes for different observations, takes seconds to complete. Digital systems help with analysis and alert automation, but only if the data entry is faster than paper.
Keep a laminated fecal scoring chart at the pen entrance.
The key is matching your record system to how work actually flows on your farm. If people are carrying smartphones anyway, digital might work. If everyone wears work gloves and carries a pencil, stick with paper for daily entries.
Converting protocols into operational reality
Having a beautiful protocol document means nothing if your weekend crew doesn't follow it or your busiest calving days default to "just keep them alive."
Start with a pilot group—maybe 10-15 animals—and run the full protocol with your most experienced person. Document what takes too long, what seems redundant, what triggers false alarms. Adjust before rolling out farm-wide.
Training needs to be hands-on. Don't hand someone a manual and expect execution. Walk through scoring systems together. Practice tube feeding on a calm animal before you need it at midnight with a weak newborn. Create visual references for fecal scores, attitude scales, and body condition that live right where the checks happen.
Your escalation triggers need clear action steps. "Monitor closely" isn't actionable. "Take temperature every 6 hours and start electrolytes if over 103°F" gives anyone clear direction. This becomes especially critical when linking to your herd health prevention protocols.
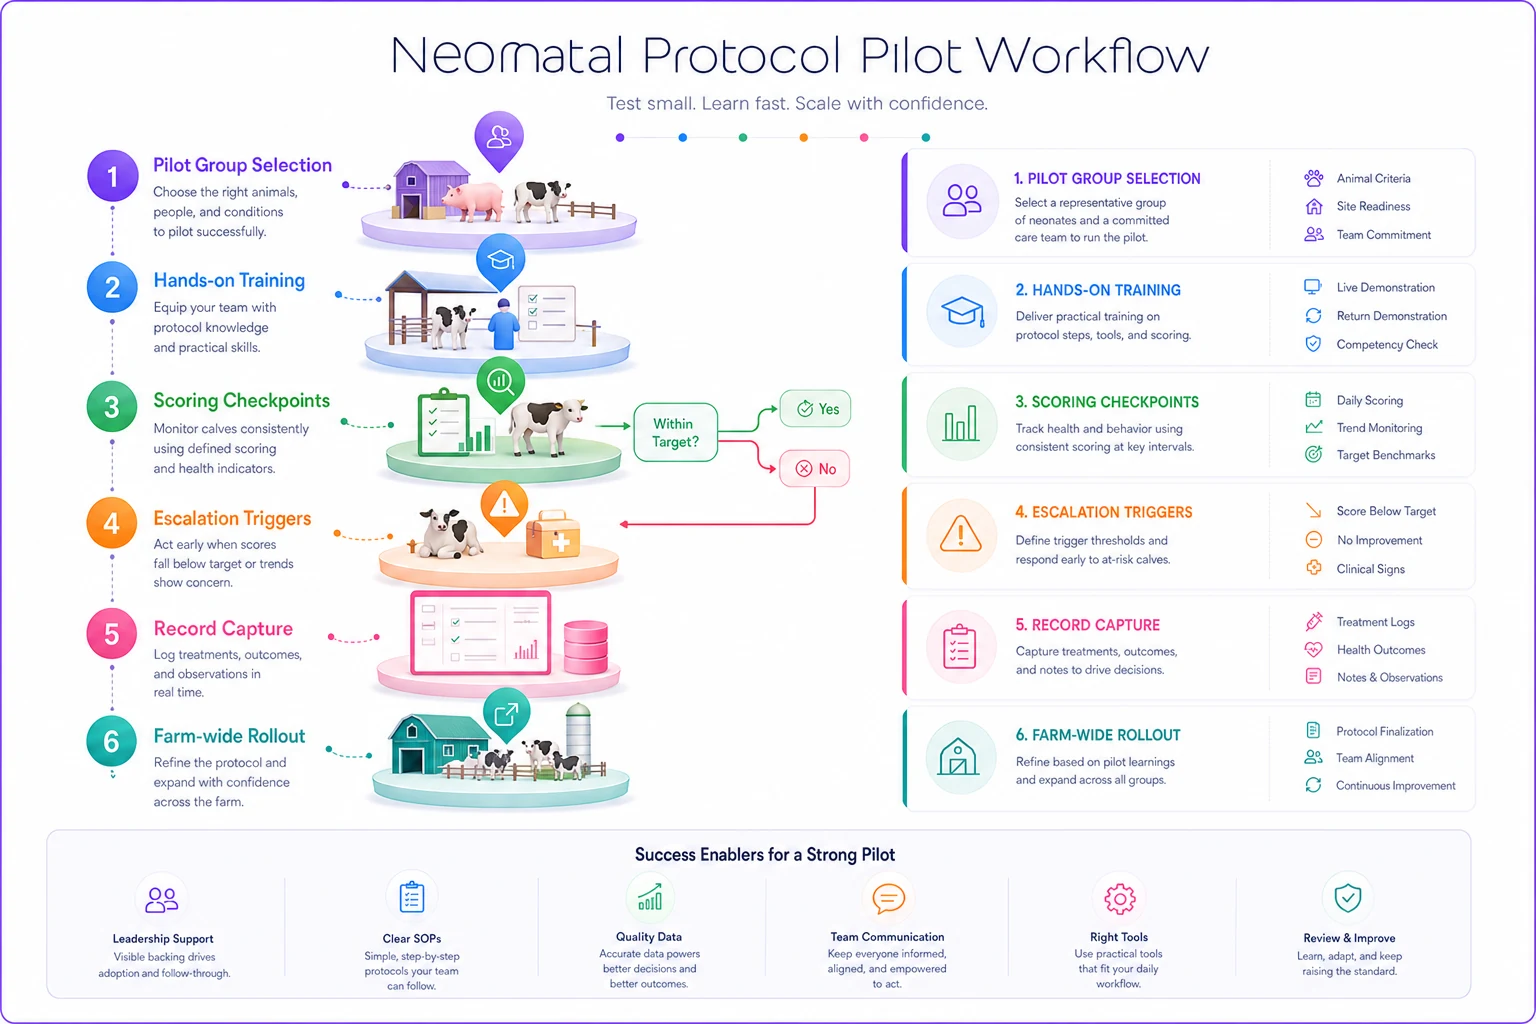
Use the workflow map during training so everyone sees who does what at each escalation level.
The protocol should specify who makes decisions at each escalation level. Can any farm hand start electrolyte therapy? Who approves antibiotic treatment? When does the vet get called? Clear authority levels prevent both delayed treatment and unnecessary interventions.
Sample escalation pathway for scours
Since scours remains the leading cause of neonatal losses, here's a detailed escalation pathway that removes guesswork:
| Level | Trigger | Action | Authority |
|---|---|---|---|
| 1 | Fecal score 3 (loose but not watery) | Add electrolyte feeding between milk feedings, document, recheck next observation | Any farm hand |
| 2 | Fecal score 4 (watery) or score 3 for >24 hours | Begin formal rehydration protocol, separate from healthy animals, temp check twice daily, alert supervisor | Experienced staff |
| 3 | Fecal score 5 (bloody) or dehydration signs | Immediate vet consultation, IV fluids if trained personnel available, isolation mandatory | Manager/owner |
| 4 | Non-responsive to treatment >48 hours | Full veterinary examination, laboratory diagnostics, review nutrition program | Veterinarian |
Each level includes WHO can make the decision, WHAT specific actions to take, and WHEN to escalate to the next level. No ambiguity, no delayed treatment while waiting for the "expert" to confirm what everyone already knows needs to happen.
This structured approach prevents both under-treatment (waiting too long) and over-treatment (jumping straight to antibiotics for mild cases). Most scours cases resolve at Level 1 or 2 when caught early.
The ROI of structured neonatal protocols
A 200-head cow-calf operation in Missouri reduced their pre-weaning mortality from 8.5% to 4.2% after implementing a structured protocol similar to what's outlined above. That's about 8-9 more calves reaching weaning, worth roughly $6,000-$7,500 at current prices.
But the bigger value comes from the improved growth rates in your surviving animals. Calves that avoid health challenges in their first 90 days consistently show 15-20% better average daily gains through weaning. Across your whole calf crop, that might mean marketing weights hitting 2-3 weeks earlier or an extra 30-40 pounds per head at the same marketing date.
The labor investment? About 5-10 minutes per animal per week for routine monitoring, with maybe 30 minutes for any intervention needed. For that same 200-head operation, you're looking at roughly 20-25 hours of added labor per week during peak season. At $15/hour, that's $300-400 weekly during calving season—paid back by saving just one calf.
The math gets even better when you factor in reduced treatment costs. Early intervention with electrolytes costs maybe $3-5 per animal. Treating severe dehydration with veterinary calls and injectable treatments runs $40-60 per case. Prevention through systematic monitoring pays for itself quickly.
Making protocols stick when things get hectic
The best protocol fails if it only works during calm periods. Your busiest times—storms during calving season, multiple births on the same night, when half your crew is sick—that's when protocols matter most.
Build redundancy into critical checkpoints. If the morning person misses the attitude scoring, the evening check should catch any problems. Use simple visual markers—a piece of tape on a gate means "check this animal next round"—that communicate across shifts without requiring logbook reviews.
Some farms integrate their protocols into daily workflow rather than treating them as separate tasks. The person feeding calves does the attitude and appetite scoring simultaneously. Whoever beds pens completes the environmental check. This embeds protocol compliance into existing routines rather than adding new tasks.
Consider seasonal adjustments too. Summer protocols might emphasize hydration and heat stress indicators. Winter protocols focus on respiratory signs and adequate caloric intake. Spring might add pasture transition monitoring. The core structure stays consistent, but emphasis shifts with risk factors.
Beyond 90 days: transitioning to next-phase management
Your neonatal protocol success should seamlessly hand off to your growing animal protocols. The data collected in those first 90 days drives decisions for months ahead.
Animals that required multiple interventions might stay on enhanced monitoring. Top performers might enter accelerated breeding programs. The growth trajectories established in these early days often predict lifetime performance.
The records from your neonatal protocol also reveal systematic issues. If every animal from a specific dam line shows slower early growth, that's breeding program information. If Tuesday-born calves consistently have more health issues than Sunday-born, you might have a labor coverage problem. Patterns only emerge when you track consistently.
Workflow integration checklist
Making structured neonatal protocols work requires embedding them into existing farm routines rather than layering on additional tasks that compete for time and attention.
-
Morning routine integration - Combine feeding with attitude/appetite scoring - Link bedding changes to environment checks - Use feeding time for fecal scoring
-
Record keeping workflow - Capture data where observations happen - Weekly batch entry to permanent records - Monthly analysis and trend review
-
Treatment protocols - Pre-positioned supplies at common intervention points - Clear authority levels for different treatments - Standard response times for each escalation level
-
Training schedule - Initial hands-on training for all staff - Quarterly refresher on scoring systems - Seasonal protocol adjustments review
This operational approach to neonatal management—breaking complex care into executable daily tasks with clear escalation rules—transforms overwhelming responsibility into manageable routine. Every person on your farm knows exactly what to check, when to worry, and what to do about it.
The farms seeing consistent success with young stock survival aren't necessarily the ones with the most experienced crews or expensive facilities. They're the ones that turned "keep an eye on the babies" into systematic observation, clear triggers, and documented outcomes that improve with each season.
That separates professional livestock operations from those just hoping for the best.
Ready to optimize your farm management?
Join hundreds of farmers using Barnyly to save time, improve animal health, and increase farm productivity.