
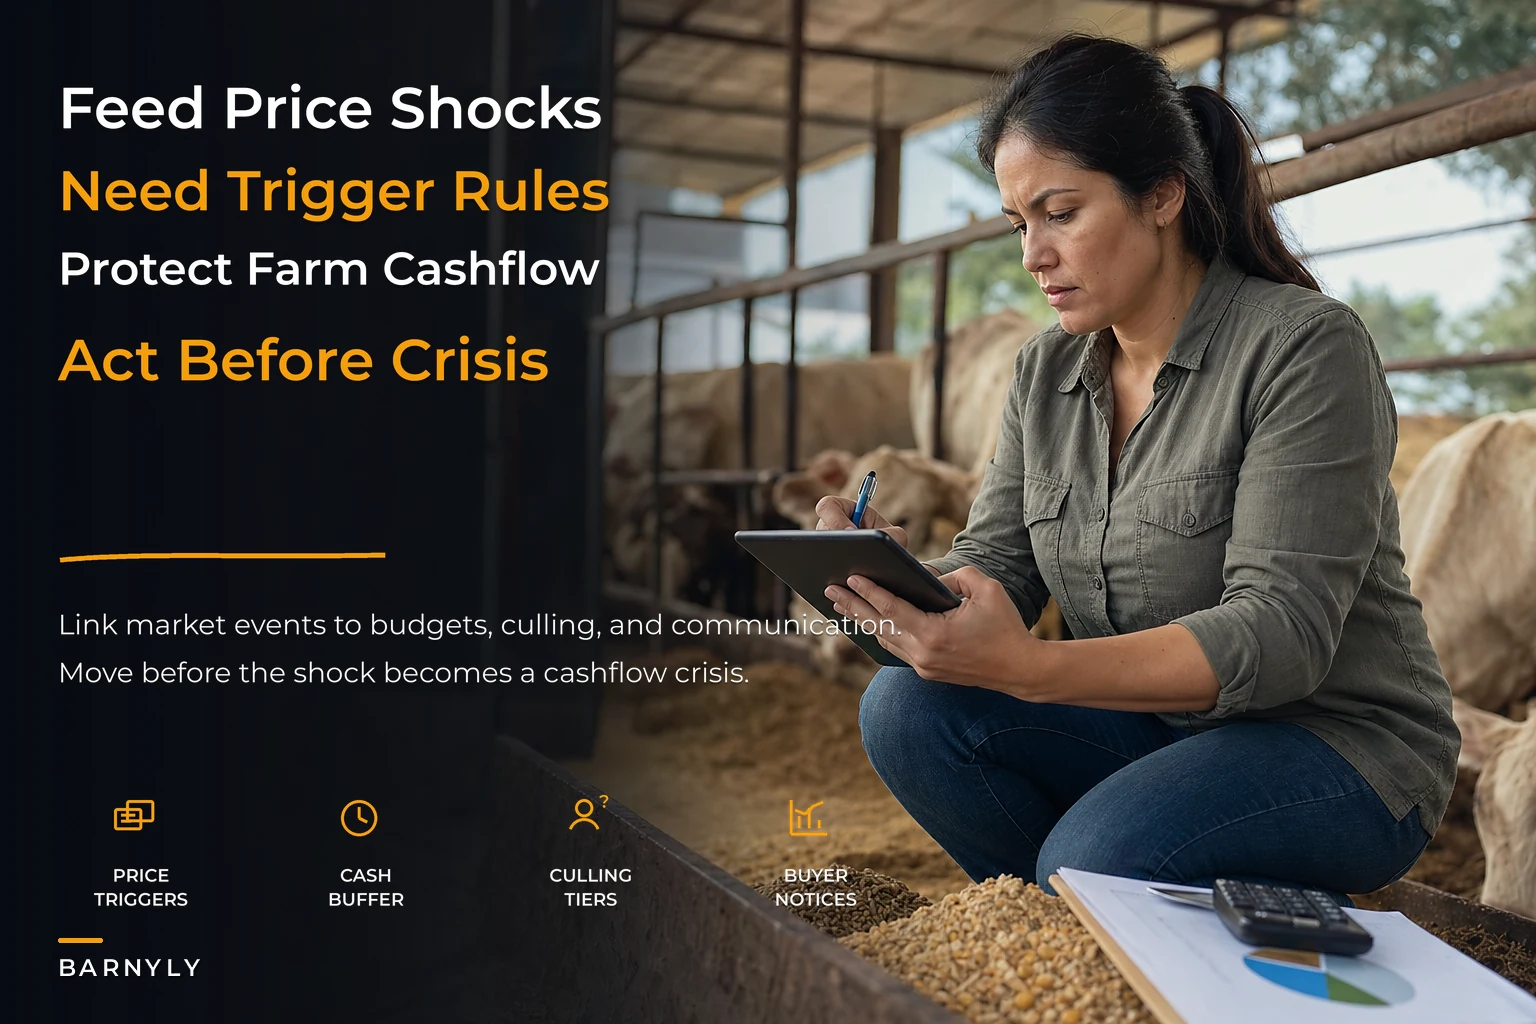

Most farms don't get wrecked by the price shock itself. They get wrecked by the two or three weeks of hesitation after it hits — the period where everyone knows something changed but nobody has a trigger that says "okay, we act now, and here's exactly what we do."
Feed jumps 22% over six weeks. The protein contract you were counting on gets repriced. A drought notice tightens the hay market in your county. These aren't surprises in the sense that they're rare — they happen every couple of years in some form. The surprise is that most operations treat each one as a fresh emergency, rebuilding a response from scratch while the clock runs and cattle keep eating.
A real farm contingency plan for a feed price shock isn't a binder. It's a set of pre-wired triggers. When this happens, that action fires — and the feed budget, the cashflow buffer, and the culling list are already connected to the same trigger. This post is about building that wiring so your response is a decision you already made, not one you're scrambling to make while margins bleed.
Why the "wait and see" default quietly costs the most
The instinct during a price spike is to wait. Prices might come back down. The vet might have a cheaper source. The co-op manager said next month could soften. So you hold, feeding the same ration at the new price, hoping.
Waiting isn't neutral. It's an active decision to absorb the full cost increase on every head, every day, until something forces your hand. On a 180-head cow-calf operation, a feed cost increase of $0.40–$0.60 per head per day isn't dramatic on any single day. But string that across three weeks of indecision and you've quietly handed away somewhere around $1,500–$2,000 before you've even made a plan. Do that twice a year and the "small" delays become your thinnest margin line.
What makes this worse is how disconnected the decisions usually are. The feed budget lives in one spreadsheet. The cash position lives in the checkbook or an accountant's head. The cull list is a mental note about "those three open cows and the old bull." None of them talk to each other. So when the shock lands, you're reconciling three separate pictures in real time, under stress, with partial information. That's where mistakes creep in — you cull animals you'll regret, or you don't cull enough and run the buffer dry.
Operations that survive shocks well aren't the ones with the biggest cash reserves. They're the ones where a single event automatically updates all three pictures at once.
The three systems that have to be wired together
Before the templates and scenarios, it helps to see the architecture. An event-driven contingency plan connects three things that normally operate in isolation:
Simplify farm operations and enhance animal care.
Barnyly helps you organize, track, and manage every aspect of your farm operations seamlessly.
- Comprehensive livestock tracking
- Automated health alerts
- Feed and resource scheduling
No credit card required
| System | What it tracks | What a shock does to it | The trigger it needs |
|---|---|---|---|
| Cashflow | Weeks of operating buffer, upcoming receivables, loan payments | Shrinks runway as feed cost rises | "Buffer drops below X weeks → act" |
| Feed budget | Ration cost per head by life stage, days of inventory on hand | Repriced overnight; inventory burns faster if you substitute | "Cost/head crosses threshold → re-run ration" |
| Culling/replacement | Which animals are marginal, their market value, replacement cost | Marginal animals become sell candidates sooner | "Trigger level reached → execute cull tier" |
The key word is mapped. Each cashflow threshold is tied to a specific feed-budget response and a specific culling tier. You don't decide in the moment how aggressive to get — you decide in advance, calmly, what each severity level looks like. If you haven't already built the underlying numbers, the groundwork in accurate seasonal feed budgets by life stage is where the per-head costs that feed these triggers come from.
Setting the trigger thresholds
Triggers only work if they're specific enough to fire without a debate. "If feed gets expensive" is not a trigger. "If delivered ration cost exceeds $X per head per day for 10 consecutive days" is.
-
Tier 1 — Watch. Feed cost rises 10–15% above your budgeted baseline, or your cash buffer drops below roughly 8 weeks of operating expenses. Action: re-run the feed budget, lock in any forward purchases that still pencil, and pull your marginal-animal list current. No selling yet. You're loading the gun, not firing.
-
Tier 2 — Act. Feed cost is 15–25% above baseline and holding for two weeks, or buffer drops below about 5 weeks. Action: execute your first culling tier (open females, chronic repeaters, the lowest-index animals), substitute lower-cost ration components where nutrition allows, and send the first communication to buyers and creditors.
-
Tier 3 — Protect the core. Feed is up 25%+ with no relief in sight, or buffer under ~3 weeks. Action: deeper cull down to your protected breeding core, renegotiate payment timing with creditors, and prioritize cash preservation over herd size.
The discipline here is that crossing the threshold triggers the action. You're not re-deciding whether it's bad enough. You decided that months ago. This is where most contingency plans fall apart — they describe actions but never define the exact line that sets them in motion.
One thing worth sitting with: the cash buffer trigger and the feed cost trigger should be treated as an either/or, not an and. A shock that spikes feed fast or one that quietly drains cash slowly can both sink you. If you require both to fire at once, you'll react too late.
Worked scenario: a 180-head cow-calf operation
Baseline. You budgeted winter ration at roughly $2.80 per head per day across the herd. Operating buffer sits around 7 weeks. You've got about 40 days of hay inventory on hand.
Week 1–2. A regional drought notice tightens the hay market. Delivered cost climbs to about $3.20/head/day — roughly a 14% jump. That crosses Tier 1. You re-run the feed budget, confirm which forward-purchase options still make sense, and refresh your marginal-animal list: 11 open cows confirmed from fall preg-checks, 3 chronic breeders, and 6 low-index older cows.
Week 3–4. Cost holds at $3.20 and creeps toward $3.45. That's now 18–23% over baseline and sustained — Tier 2. You execute the first culling tier. Selling the 11 open cows at roughly $1,150–$1,300 each pulls in somewhere around $13k–$14k. More importantly, removing 11 head cuts your daily feed burn by roughly $35–$38 a day, which protects the buffer going forward. You send the buyer and creditor communications (templates below).
Week 6. The hay market stays tight but stabilizes. Your buffer, which was heading toward 4 weeks, is back above 6 because of the cull proceeds and the reduced daily burn. You hold at Tier 2 and don't need to touch the breeding core.
The point isn't the exact dollars. It's that each move was pre-decided and tied to a threshold. Nobody spent a stressful weekend arguing about whether to sell the open cows. The trigger made the call. For a fuller view of how each of those herd events — a sale, a cull, a preg-check result — ripples into your financials, the approach in mapping herd events to your P&L connects these moves directly to per-head profitability.
Culling and replacement rules that hold up under pressure
The hardest part of a shock isn't deciding to cull — it's deciding who, fast, without emotion overriding economics. A pre-built culling hierarchy solves this. Rank your sell candidates before any shock hits:
-
Tier A (first to go) Open females, confirmed non-breeders, chronic health repeaters, and animals whose maintenance cost exceeds their realistic contribution.
-
Tier B (second wave) Low-index producers, older animals near the end of productive life, poor-temperament or hard-keeping animals that cost more to maintain.
-
Tier C (protect unless desperate) Proven mid-life breeders and genetically valuable animals. These leave only at Tier 3 severity.
-
Protected core Your best young proven females and key genetics. These are the last line — selling them is selling your recovery.
The replacement side gets forgotten more than it should. Culling during a shock is cheap; replacing later can be expensive if everyone's buying back in at the same time. Build a rule: any animal culled at Tier B or deeper is only replaced when both (a) feed cost returns within 8% of baseline, and (b) replacement cost pencils against projected returns. That stops the common mistake of panic-selling in a down market and panic-buying in a recovering one — buying high after selling low, the worst possible sequence.
Operations that cull tier by tier recover faster than operations that cull in one big emotional sweep. The sweep usually goes too deep because it's driven by fear in a single bad week, right when prices for sellers are worst.
Communication templates: buyers and creditors
Price shocks are also coordination events. The farms that handle them cleanly get ahead of the conversations instead of going quiet and hoping. Silence is what spooks creditors and costs you buyer leverage.
Buyer outreach (when you're moving cull animals quickly):
> Subject: Available this week — [#] head, [class/description] > > Hi [Name], we're moving a group of [11 open cows / cull females], [weights/age range], available for pickup [date range]. Condition is [sound/good], recent [vaccination/health] records available on request. Looking for [price range or "your best offer this week"]. Can send photos and weights today. Let me know if the group or a partial lot works for you.
Keep it short, specific, and time-bound. Buyers respond to clarity and a defined window. Vague "might have some cows available" messages get vague responses.
Creditor / lender notice (when adjusting payment timing):
> Subject: Proactive update on [operation name] — feed market and cashflow > > Hi [Name], wanted to reach out ahead of [payment date]. The recent feed market move has tightened our short-term cashflow. We've already executed our contingency plan — reduced herd by [#] head and cut daily feed cost by roughly [$ amount]. We expect cash position to recover by [timeframe]. I'd like to discuss [a one-time payment adjustment / interest-only for one cycle / revised timing]. Happy to share our updated budget and the actions we've taken. Can we talk this week?
Lenders react far better to an operator who shows a plan already in motion than to one who goes silent and misses a payment. The second template works because it leads with action taken, not just a request for relief.
When this level of planning actually makes sense (and when it doesn't)
It makes sense when: you run enough head that daily feed cost is a material line item, you carry any debt service, or you've been burned by at least one shock before. Anyone buying significant feed off-farm rather than grazing year-round should have these triggers written down. If a 20% feed move changes your year, you need this.
It's overkill when: you're a small operation grazing most of the year with minimal purchased feed, no debt, and a deep cash cushion. Formal tiered triggers add process you probably don't need. A simpler "if feed crosses X, review" note is plenty.
Who should NOT try to run this as a one-person mental exercise: multi-site operations, or any farm where more than one person touches feed buying, selling, and finances. The moment coordination crosses people or locations, the plan has to live somewhere shared — not in one manager's head. That's exactly where the disconnect we started with comes from.
Keeping the three pictures connected as you scale
At 80 head, you can almost hold cashflow, feed burn, and your cull list in your head. At 400 head across two sites with a hired hand buying feed, you can't — and the gaps between those three pictures are where the losses hide. The feed manager doesn't know the cash buffer dropped. The owner doesn't know the ration got substituted. The cull list is three weeks stale.
This is the practical reason to keep these numbers in one connected system rather than scattered across spreadsheets. When your per-head feed cost, current inventory days, cash buffer, and marginal-animal list all update from the same records, a trigger can actually fire on its own — you set the threshold once, and the system flags the day feed cost crosses the line or buffer drops below your floor, instead of you noticing a month late.
Store thresholds and trigger logic in a shared dashboard so buying, feeding, and finance see the same flags in real time.
Here's a simple visual that shows the flow from monitoring to action.
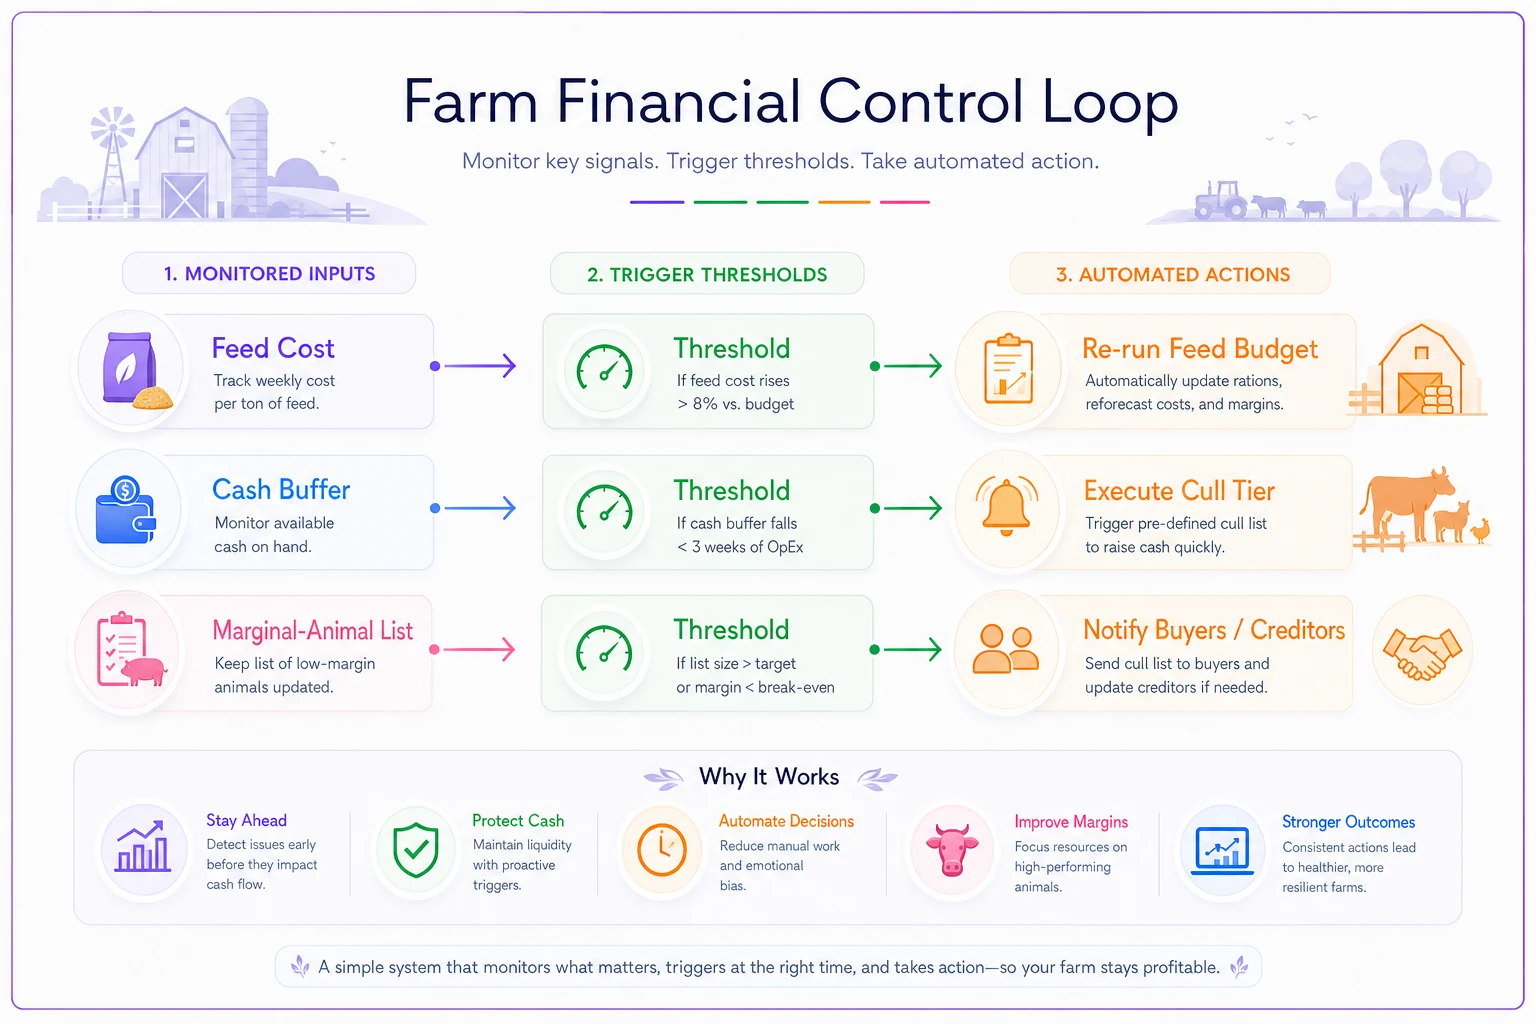
The value isn't the software for its own sake; it's that the shock-response decision is only as good as how current the numbers are when the shock hits. Stale numbers mean a late, wrong call.
The farms that come through price shocks with their breeding core intact aren't lucky and they don't have crystal balls. They decided, in a calm month, exactly what each severity level looks like — which number trips which action, which animals go in which order, and who gets a message when. Then when feed jumps 22% and the hay market tightens, they're not building a response. They're running one they already own.
Ready to optimize your farm management?
Join hundreds of farmers using Barnyly to save time, improve animal health, and increase farm productivity.